Deploying Java Aplications With Kubernetes
Three months ago I was learning Docker swarm now I’m learning kubernetes as orchestrator this year I’m gonna write about k8s a lot so the idea here is show how to deploy Java Aplications within Docker Containers orchestra them with Kubernetes.
When you run containers you always gonna need a orchestrator in order to be more efficient, faster and continuous delivery and so on that’s the reason why I’ve chosen kubernetes and the true is basically because is the most popular I would say it’s so robust, ambicious, fault-tolerance, scaling, discovery abilities and why not use it, mainly was created at Google and now is hosted by the Cloud Native Computing Foundation(CNCF).
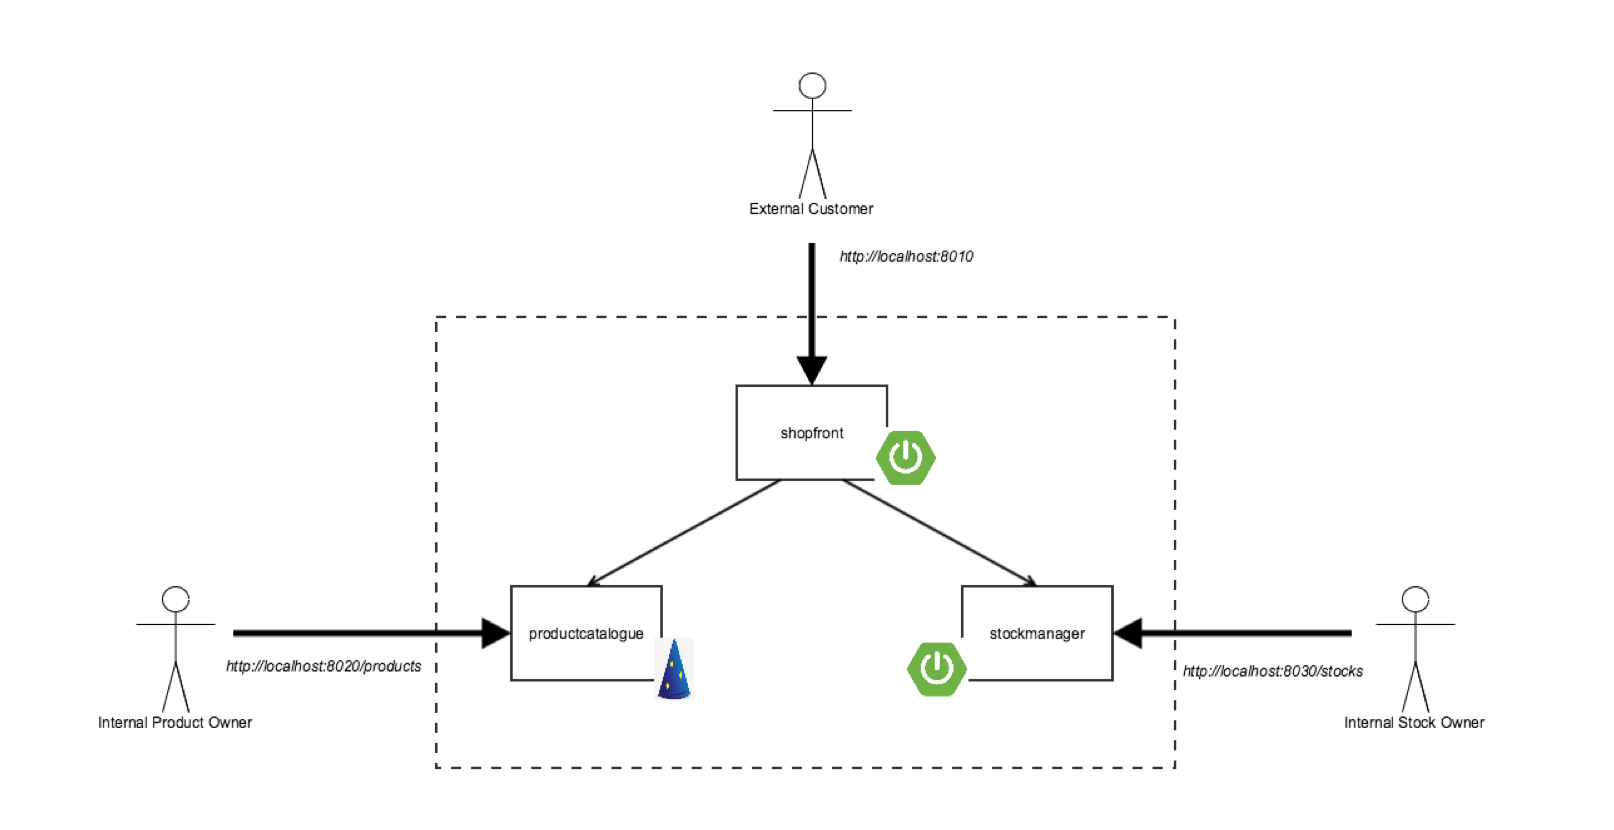
Let’s see the architecture of the “Docker Java Shopfront” application:

Now I will write some concepts which it’s important know.
- kubectl Kubernetes command-line tool which control the kubernetes cluster manager.
- labels It’s the way how we can identify pods and be selected we have the freedom of write in JSON or YAML format.
- Pods is essentially a group of one o more containers we can say it’s a set of one or many containers sharing the same IP, share a filesystem and network namespace. The way how k8s communicate with pods is through kubectl.
- Services Provide load balancing, naming and discovery to isolate one microservices from another working together with Replications Controller which ensure that containers are working within pods correctly.
Prerequisities:
-
Docker for Mac/Windows/Linux Kubernetes will work with one of the most popular provider containers (Docker).
-
Minikube It’s a tool that run a single-node Kuebernetes test cluster via VM.
-
A github account and Git - The examples(code) of this deployments are hosted in github, using git locally you can clone, fork, commit and so on.
-
Docker hub account - You will need to host your images but it’s up to you because you can use the original source.
-
Java 8 or 9 SDK and Maven(mvn) - We will use Maven(in my case I didn’t install mvn I just runned a container with Maven into a Container, you see the step next) in order to build code and dependency tool that uses Java 8.
Let’s create a service for shopfront
Clone the repository:
$ git clone git@github.com:tuxisma/oreilly-docker-java-shopping.git

$ cd oreilly-docker-java-shopping/shopfront
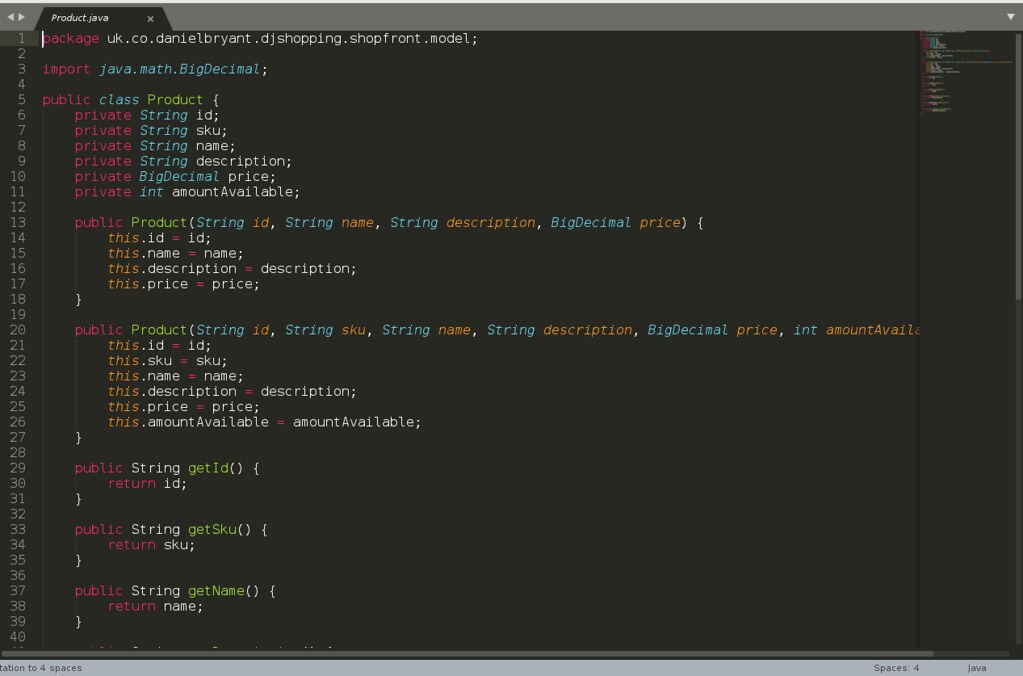
I loaded the code of shopfront on sublime in order to look into it.
 This code is one of them.
Now we gonna build the application using Maven as a result of -we will see a JAR located in the ./target directory.
Here a trick:
I didn’t install Maven but I need to have mvn which means I can run it into a container, just go into shopfront/ and mvn will take the pom.xml file.
(Trick share it by yazpik )
docker run -it --rm -v $PWD:/usr/src/mymaven -w /usr/src/mymaven maven mvn clean install
Now I will create a image from Dockerfile:
FROM openjdk:8-jre
ADD target/shopfront-0.0.1-SNAPSHOT.jar app.jar
EXPOSE 8010
ENTRYPOINT ["java","-Djava.security.egd=file:/dev/./urandom","-jar","/app.jar"]
Our container image shuld be created from the openjdk:8-jre, the second line adds the app to the image, the third line specify that our app will be available through port 8010 and the last line specifies the entrypoint which means the command to run when container is initialized.
Let’s build the image:
tuxisma(user on dockerhub)
$ docker build -t tuxisma/djshopfront:1.0 .
Successfully built 87b8c5aa5260
Successfully tagged tuxisma/djshopfront:1.0
Non I will push the image to Docker Hub.
$ docker login
Login with your Docker ID to push and pull images from Docker Hub. If you don't have a Docker ID, head over to https://hub.docker.com to create one.
Username:
Password:
Login Succeeded
$
$ docker push tuxisma/djshopfront:1.0
The push refers to a repository [docker.io/tuxisma/djshopfront]
9b19f75e8748: Pushed
...
cf4ecb492384: Pushed
1.0: digest: sha256:8a6b459b0210409e67bee29d25bb512344045bd84a262ede80777edfcff3d9a0 size: 2210
Deploying with Kubernetes
Well we have the image of shopfront in Java. Let’s run this image called tuxisma/djshopfront:1.0 using k8s, change the “kubernetes” directory in the root of the project:
$ cd ../kubernetes
We see in the yaml file the version of API(v1), kind of pod , the way of how need to write a yaml file is basically key: value where key is apiVersion and value is v1 and so on.
Basically we have two types of structure in yaml file:
-
Maps
-
Lists
Maps
Usually you can find yamls in this way:
---
apiVersion: v1
kind: Service
metadata:
  name: shopfront
  labels:
    app: shopfront
At the first line we have a separator could be optional but if you want to define multiple structures in the same file use it. Next we have a name(known as key) then a value, pay attention now the key metadata has other two more keys(name, labels) and labels key has another key named app and its value(shopfront). Labels is used to organize and to select subsets of objects, labels are key:value pairs as well.
Be careful with spaces, look onto yaml file notice that metadata key has two more keys as I mentioned both at the same level I will recommend you use two space left to right(see name and labels) ‘cause both belong to metadata or if you want use one space at least, the goal is achieve the indentation as programming language tend to do. Please don’t use tab
Lists
Yaml lists are sequence of objects:
args
  - sleep
  - "1000"
  - message
  - "Bring back Firefly!"
We can see any muber of items in a list which start with dash(-) idented from the parent(args).
And obviusly members of the list can be maps:
 spec:
      containers:
      - name: nginxhttps
        image: tuxisma/djshopfront:1.0
        ports:
        - containerPort: 8010
        livenessProbe:
          httpGet:
            path: /health
            port: 8010
          initialDelaySeconds: 30
          timeoutSeconds: 1
Let’s put the shopfront-service.yaml file together
---
apiVersion: v1
kind: Service
metadata:
  name: shopfront
  labels:
    app: shopfront
spec:
  type: NodePort
  selector:
    app: shopfront
  ports:
  - protocol: TCP
    port: 8010
    name: http

---
apiVersion: v1
kind: ReplicationController
metadata:
  name: shopfront
spec:
  replicas: 1
  template:
    metadata:
      labels:
        app: shopfront
    spec:
      containers:
      - name: nginxhttps
        image: tuxisma/djshopfront:1.0
        ports:
        - containerPort: 8010
        livenessProbe:
          httpGet:
            path: /health
            port: 8010
          initialDelaySeconds: 30
          timeoutSeconds: 1
Here we are creating a service named “shopfront” that will route TCP traffic on port 8010 to pods using the label “app:shopfront”. The next structure creates a ReplicationController that says to k8s how many containers should run(one replica) as we have declared as part of the “spec”(specification) labelled as app: shopfront. It’s important specify that the port 8010 application traffic port in our Docker container is open, also we have a livenessProbe(healthcheck) which mean that k8s check if our containerized applications is running correctly and ready to acept traffic.
Now, we need to start minikube in order to deploy this service(shopfront).
$ minikube start --cpus 2 --memory 4096
Starting local Kubernetes v1.7.5 cluster...
Starting VM...
Getting VM IP address...
Moving files into cluster...
Setting up certs...
Connecting to cluster...
Setting up kubeconfig...
Starting cluster components...
Kubectl is now configured to use the cluster.
Deploying:
$ kubectl apply -f shopfront-service.yaml
service "shopfront" created
replicationcontroller "shopfront" created
Let’s check all the services within k8s:
$ kubectl get svc
NAME         CLUSTER-IP   EXTERNAL-IP   PORT(S)          AGE
kubernetes   10.0.0.1     <none>        443/TCP          18h
shopfront    10.0.0.216   <nodes>       8010:31208/TCP   12s
Now checking the pods:
$ kubectl get pods
NAME              READY     STATUS              RESTARTS   AGE
shopfront-0w1js   0/1       ContainerCreating   0          18s
As we can see the pod is just creating, what about now:
$ kubectl get pods
NAME              READY     STATUS    RESTARTS   AGE
shopfront-0w1js   1/1       Running   0          2m
Yeah!!!! We’ve just created our first service onto Kubernetes.
As you can see the name of pod is shopfront-0w1js Afther the dash (-) we have a key of pod.
Testing
I will use curl in order to get data from shopfront application’s healthcheck endpoint.
$ curl $(minikube service shopfront --url)/health
And …
{"status":"UP"}
Everything is OK, the application is up and running.
Building the remaining applicactions
We have one container uo and running let’s build the other two supporting microservice applications:
$ cd ..
$ cd productcatalogue/
$ docker run -it --rm -v $PWD:/usr/src/mymaven -w /usr/src/mymaven maven  mvn clean install
…
$ docker build -t tuxisma/djproductcatalogue:1.0 .
...
$ docker push tuxisma/djproductcatalogue:1.0
...
$ cd ..
$ cd stockmanager/
$ docker run -it --rm -v $PWD:/usr/src/mymaven -w /usr/src/mymaven maven  mvn clean install
…
...
$ docker build -t tuxisma/djstockmanager:1.0 .
...
$ docker push tuxisma/djstockmanager:1.0
…
We have built all of our microservices, associated Docker images, pushed the images to Docker Hub. We gonna deploy the “productcatalogue” and “stockmanager” services to Kubernetes.
Deploying the entire Java applications in Kubernetes
$ cd ..
$ cd kubernetes/
$ kubectl apply -f productcatalogue-service.yaml
service "productcatalogue" created
replicationcontroller "productcatalogue" created
$ kubectl apply -f stockmanager-service.yaml
service "stockmanager" created
replicationcontroller "stockmanager" created
$ kubectl get svc
NAME               TYPE        CLUSTER-IP      EXTERNAL-IP   PORT(S)          AGE
kubernetes         ClusterIP   10.0.0.1       <none>        443/TCP          19h
productcatalogue   NodePort    10.0.0.37      <none>        8020:30160/TCP   42s
shopfront          NodePort    10.0.0.216     <none>        8010:30019/TCP   13m
stockmanager       NodePort    10.0.0.149     <none>        8030:31089/TCP   16s

$ kubectl get pods
NAME                     READY     STATUS    RESTARTS   AGE
productcatalogue-79qn4   1/1       Running   0          55s
shopfront-0w1js          1/1       Running   0          13m
stockmanager-lmgj9       1/1       Running   0          29s
How looks the complete application
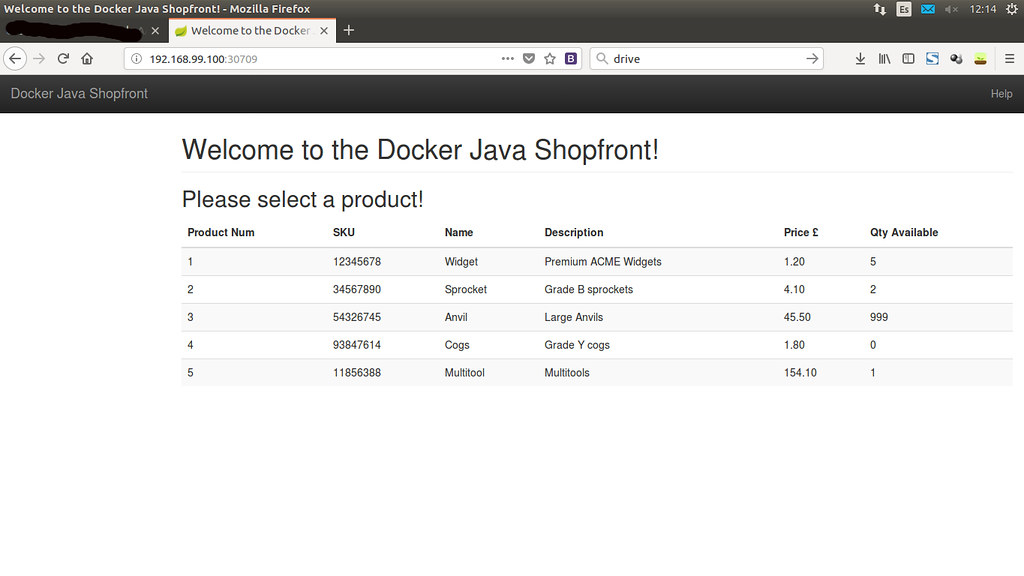
Let’s acces to application via the shopfront servie GUI. Our application will open the service in our default browser on my way is Firefox, use the following command in minikube:
$ minikube service shopfront
See the magic!

We’ve deployed our microservices using Kubernetes <3
Source: